In-Flight Adjustable Compensation Curve
Why
Deploying flaps changes wing camber — high-wing aircraft tend to "balloon up", low-wing aircraft tend to sink — needing elevator correction that's non-linear with flap deflection, so a curve rather than a fixed offset. This walkthrough uses Vars to make a compensation curve's points adjustable in flight, via a repurposed throttle trim, gated by which curve point the flap stick is currently near — building on How-To: Butterfly Mixer's elevator compensation step.
1. Choose the curve type
A 5-point custom curve is enough for smooth compensation without excess complexity. Point 5 (rightmost, flap stick fully up / no flaps) is always fixed at zero — no compensation needed with no flaps deployed. The other 4 points are made adjustable via Vars. Since the flap stick will often sit between two defined points, both points on either side of it need to be adjustable together in that overlap zone.
2. Calculate overlapping ranges
Point-to-point ranges (adapted, with permission, from Mike Shellim's "Crow-aware adaptive elevator trim" for OpenTX at rc-soar.com — extended slightly so Pt2's range reaches all the way to +100%, for the reason explained in Step 6):
| Flap stick range | Active point(s) |
|---|---|
| +100% to +45% | Pt2 only |
| +45% to +20% | Pt2 and Pt3 |
| +20% to −20% | Pt3 only |
| −20% to −45% | Pt3 and Pt4 |
| −45% to −90% | Pt4 only |
| −90% to −100% | Pt5 only |
3. Configure the logical switches
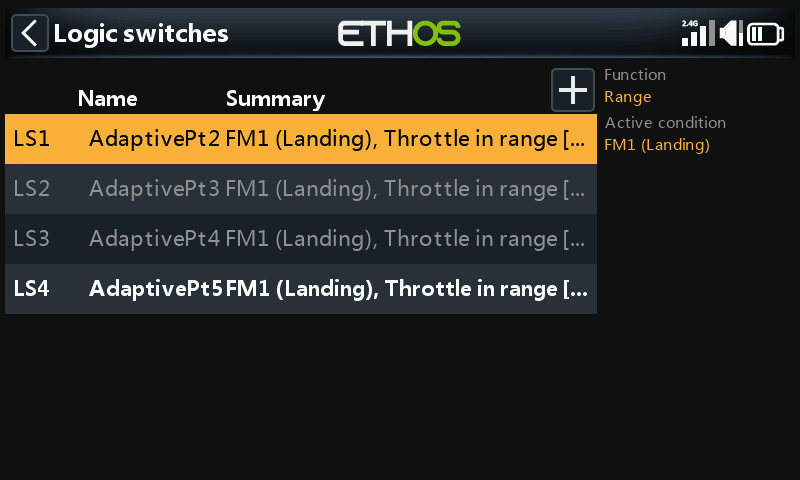
Four logical switches, each using Range on the flap (throttle) stick, active while the stick is in that point's zone:
AdaptivePt2— range 20% to 100% (extended to 100% specifically so Pt2 can be adjusted even with no flaps deployed — see Step 6).
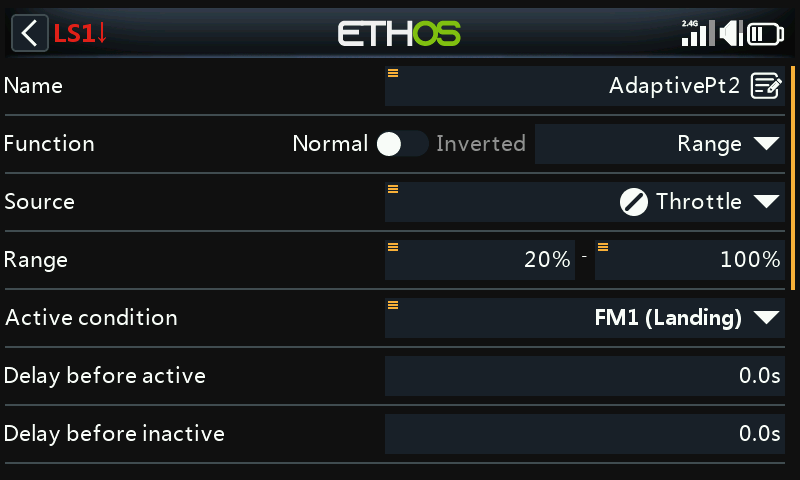
AdaptivePt3— range −45% to 45%.
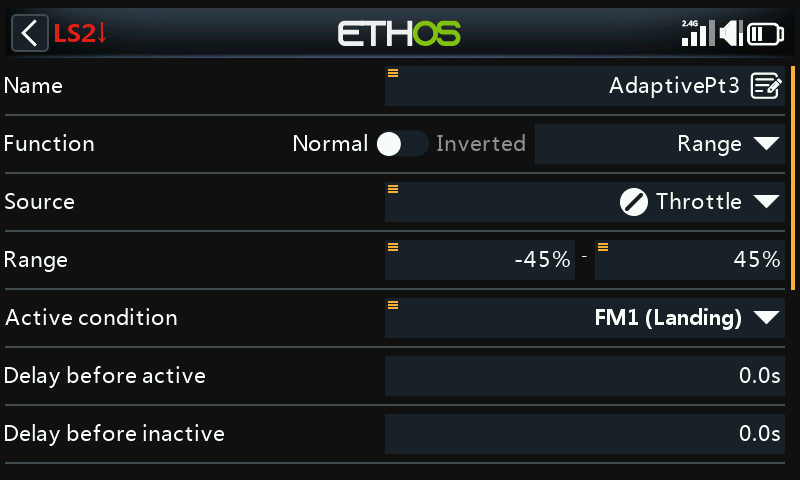
AdaptivePt4— range −90% to −20%.
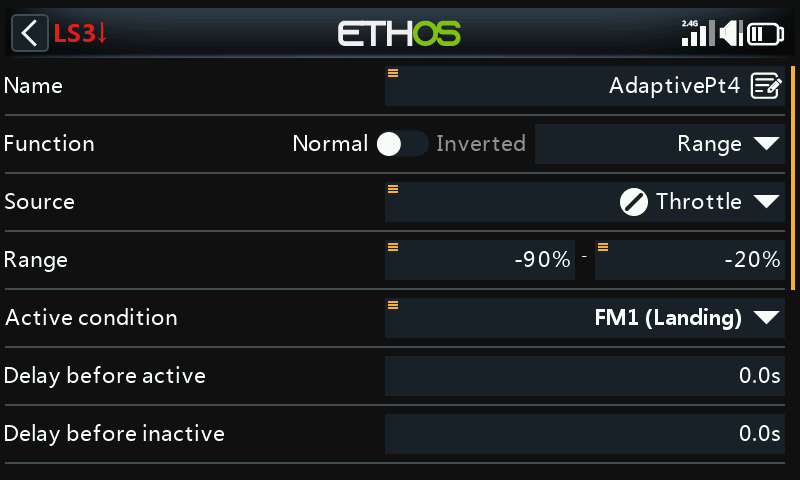
AdaptivePt5— range −100% to −90%.
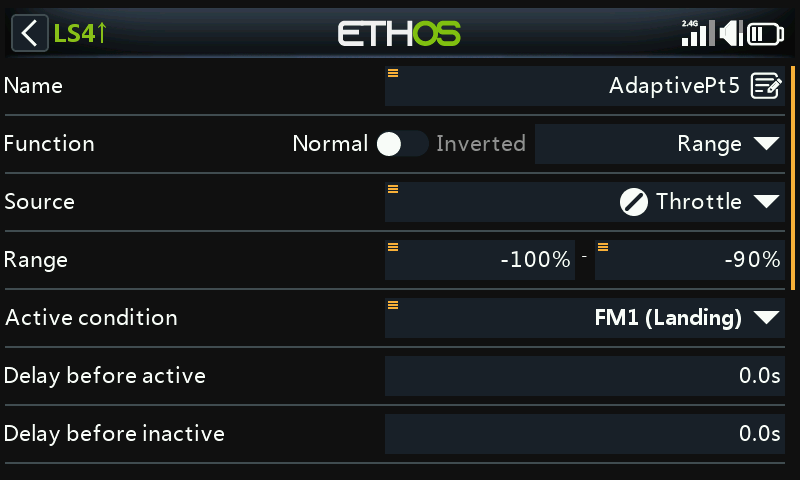
4. Define the adjustment Vars
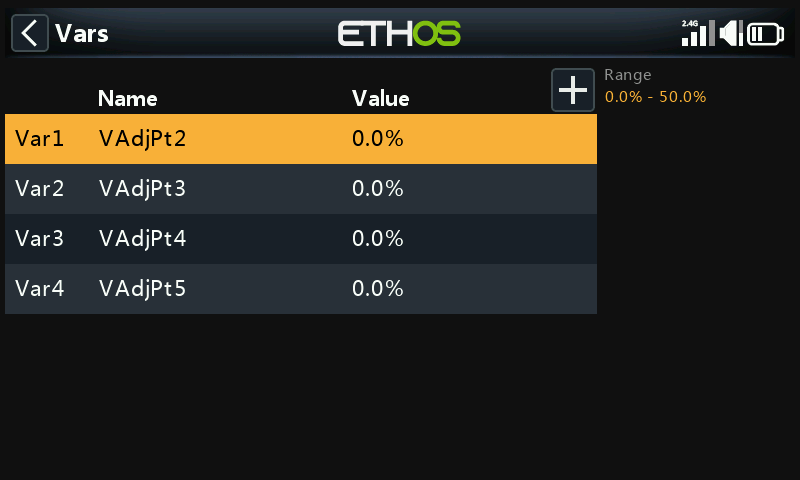
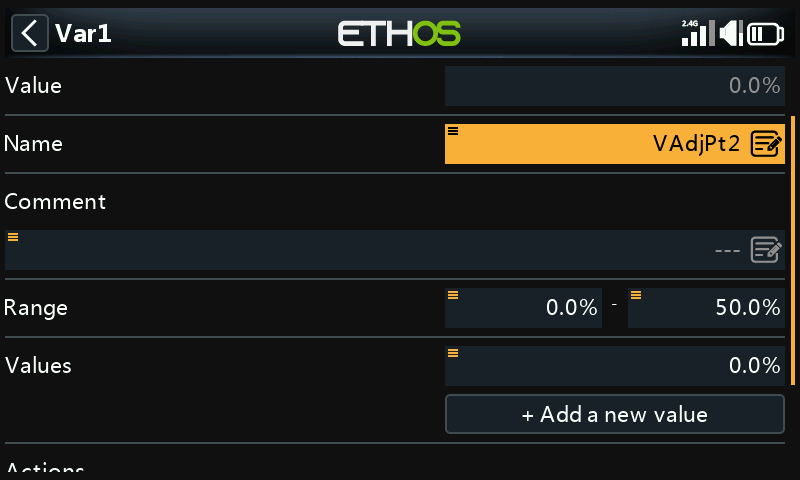
Four Vars, VAdjPt2–VAdjPt5, each with
range 0–50% (widen if needed) and a repurposed throttle trim action —
step size 1.0%, active condition the matching logical switch:
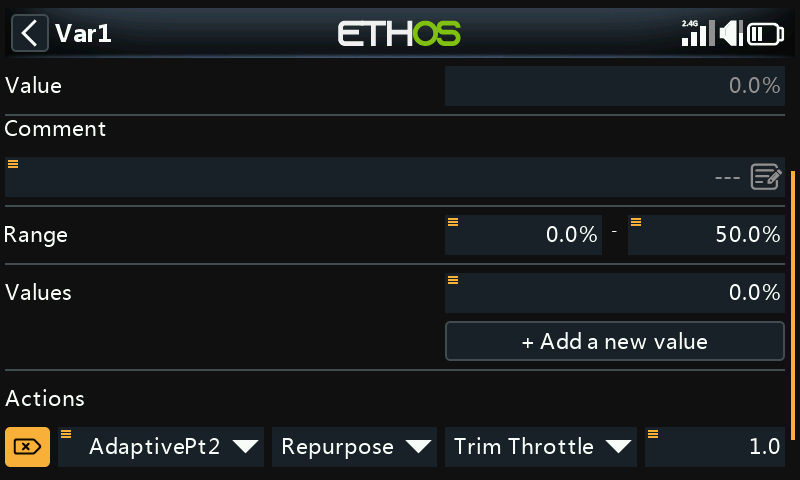
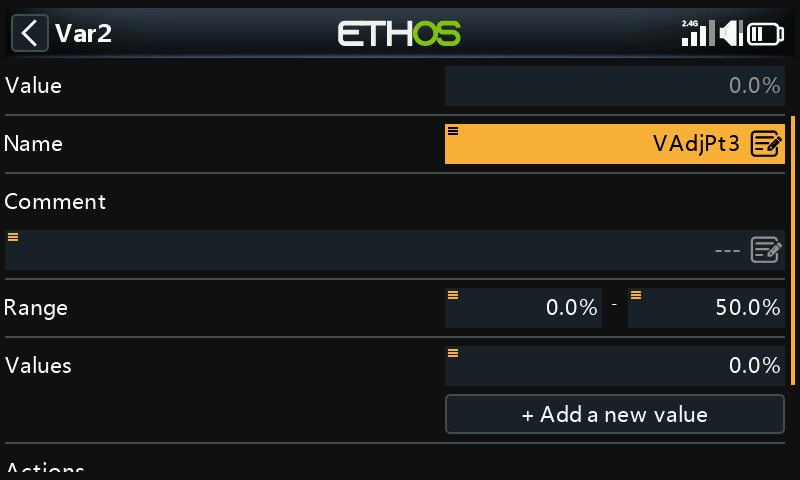
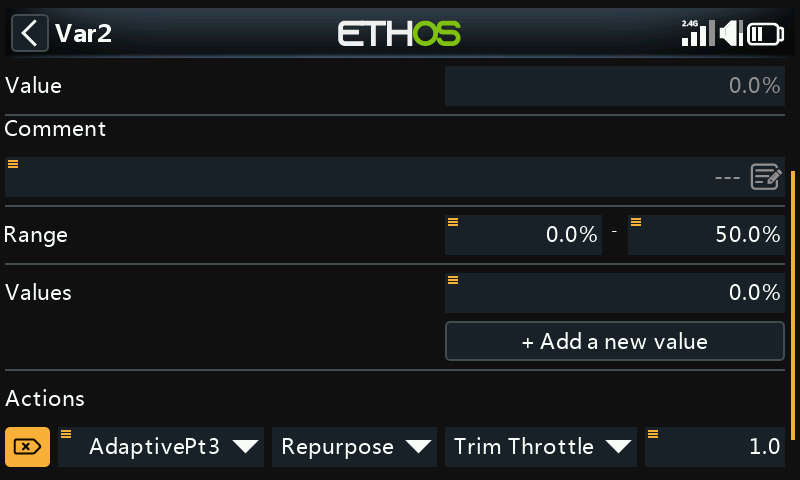
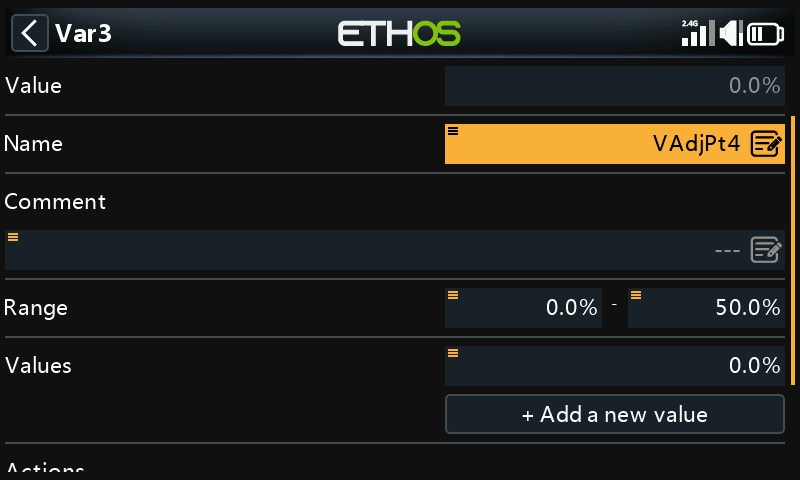
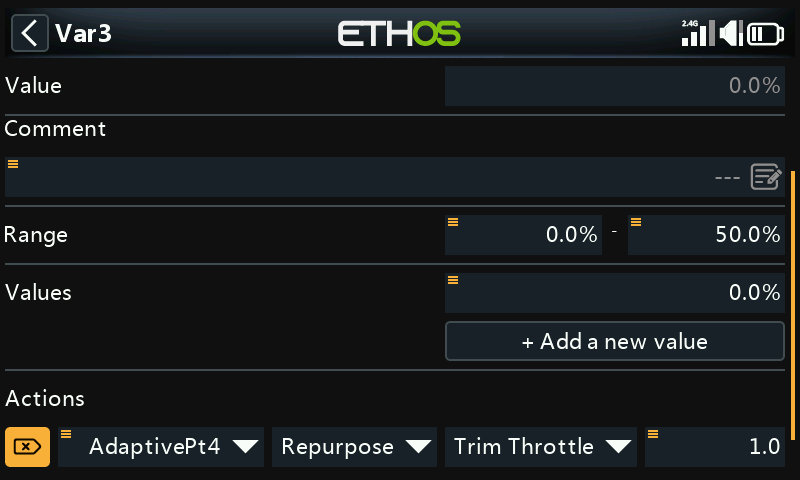
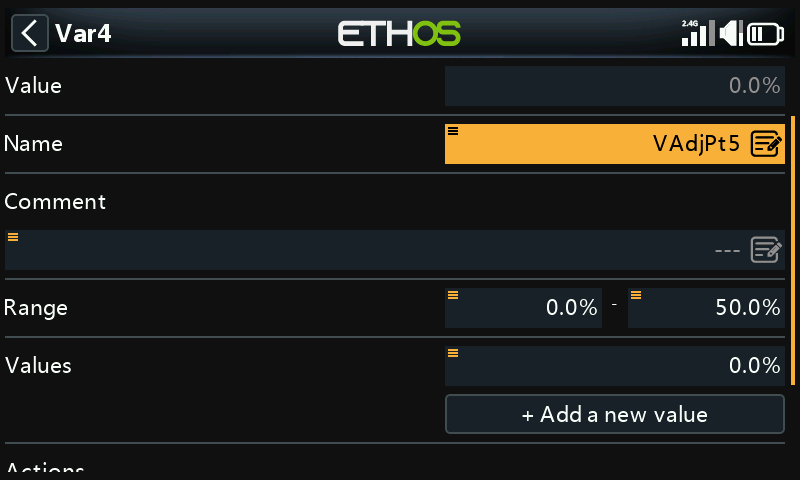
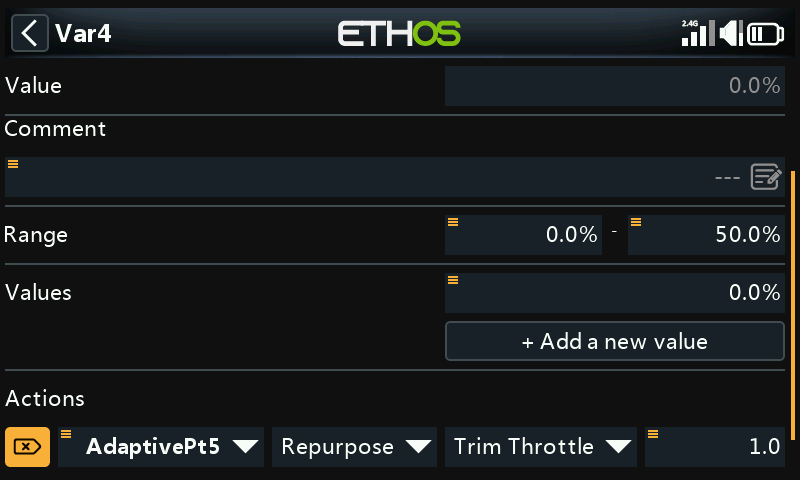
Since only one logical switch (at most two, in the overlap zones) is active at a time, the same physical trim safely adjusts different Vars depending on flap position.
5. Define the compensation curve
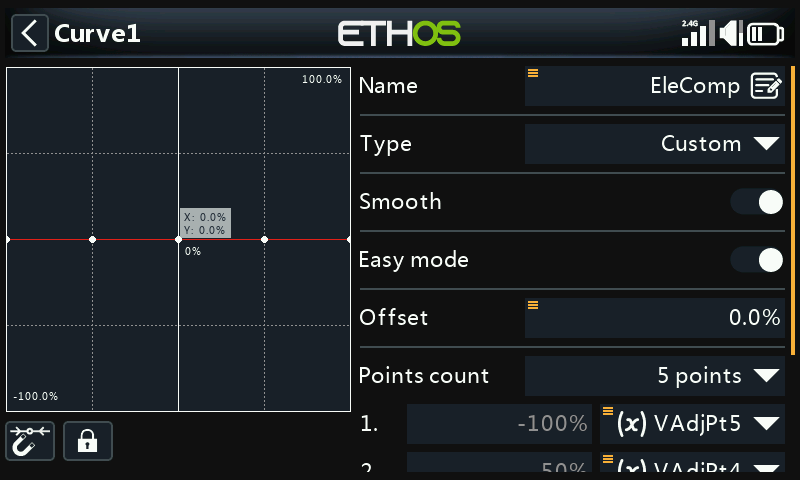
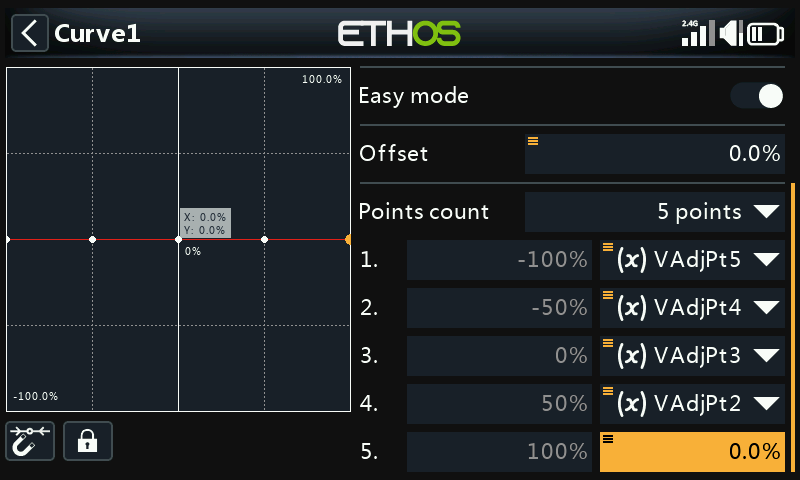
A new 5-point custom curve (e.g. "EleComp") with Smooth enabled.
Long-press ENT on points 1–4 and Use a source to assign
VAdjPt5…VAdjPt2 respectively (point 5 stays fixed at 0, per Step 1).
6. Apply the curve
Use this curve exactly where How-To: Butterfly Mixer attaches its EleComp curve to the elevator compensation mix.
Where possible, start from real data (manufacturer guidance, community posts) on how much elevator travel a given flap deflection needs; otherwise a few millimeters of compensation at full flaps is a reasonable starting point.
Tuning approach
Start with small amounts of flap and small trim adjustments.
AdaptivePt2 can be tuned with no flaps deployed at all — apply
a little flap, remove it again, and dial in a touch of compensation
at a time, rather than fighting a ballooning or sinking model while
trying to trim under pressure. Reapply a little flap to check, adjust
again as needed. Once Pt2 feels right, move to the next point around
mid-stick — if Pt2 needed a large trim change, it's worth landing and
setting the remaining points to each be slightly larger than the
last, rather than guessing blind.